Allure Plugin⚓︎
This article is about installing the tool Allure, which you can use to generate test reports.
First we need to take care of the installation of Allure. Go to the Central Repository page: Allure CLI and download the file called allure-commandline-*.zip, replacing * with the latest version. Unzip it to a directory of your choice. Inside the directory where you saved Allure you will find the folder bin. Add this to the environment variable PATH. Then open a terminal and enter the command allure. You should see a list of possible commands for the Allure CLI.
Alternative installation possibility with Scoop⚓︎
Scoop is a command line installation programme for Windows. With Scoop you can install programs and plugins for your terminal.
- Open PowerShell. You can do this by searching for PowerShell in the Start menu.
- Type the following in PowerShell:
iwr -useb get.scoop.sh | iex - Press the Enter key. PowerShell will now install Scoop.
If you get an error message regarding ExecutionPolicy after entering the command line, enter the following command in PowerShell:
This will change the ExecutionPolicy for your account to remote signed and you can install Scoop. After installing Scoop, you can access Scoop Help in PowerShell or Command Prompt to get a list of Scoop commands.
After you have installed Scoop, open PowerShell and enter the following command:
You can verify that Allure is installed correctly by opening a terminal and typing allure. You should see a list of possible commands for the Allure CLI.
The QTAF Allure Plugin⚓︎
In addition to qtaf-core, first integrate the dependency qtaf-allure-plugin into your project: Make sure that you use the current version numbers of these modules. You can find them at the Maven Repository
Check the Maven Central repository for the current version of the plugin.
This completes the installation of the Allure plugin. In the configuration.json file, you can now add the following options for taking screenshots, which will then be included in the Allure report:
You can then run your test cases as usual. After the test cases have been executed, the QTAF Allure plugin automatically creates the folder allure-results in the root directory of your project. This is where the data for the Allure report is stored in JSON files.
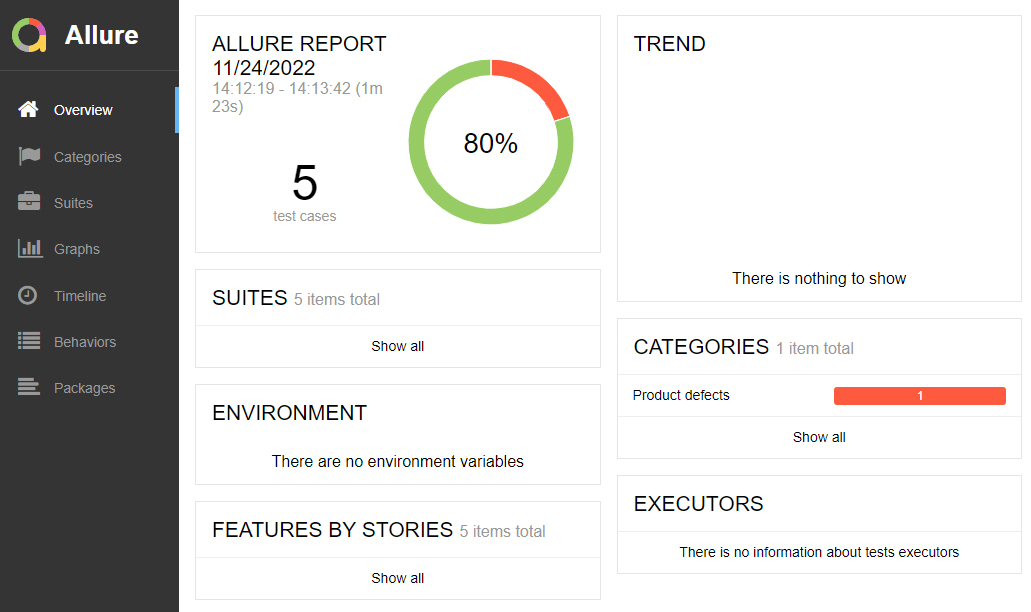
Now execute the command allure serve in the root directory of your project. After a few seconds, the Allure Report will open in your browser.
Some Allure Screenshots⚓︎
Allure Dashboard⚓︎
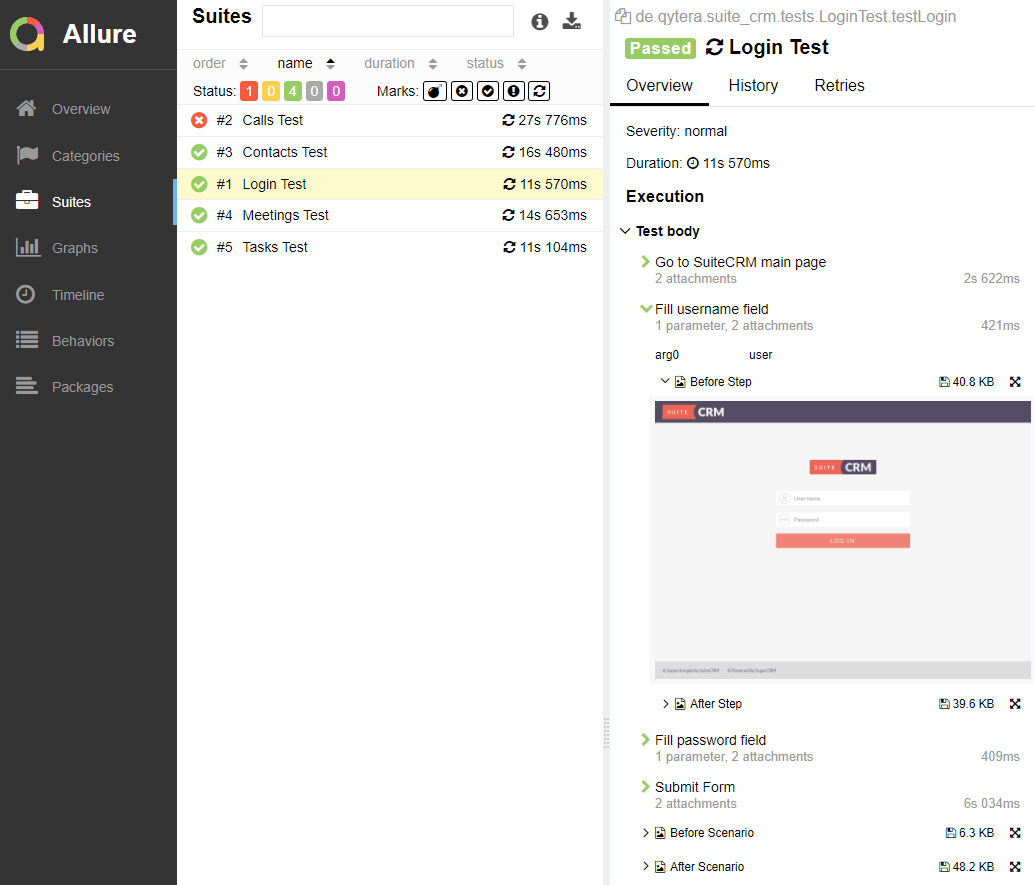
Test Steps with Screenshots⚓︎
Historic Test Executions⚓︎
