QTAF Xray Plugin⚓︎
One possibility to export and document test results is Xray for Jira. In this article we show you how to create test cases in Xray, how to link your test cases written in Java with the test cases defined in Xray and how QTAF can automatically save the test results of your test runs in Xray.
Create test cases in Xray⚓︎
The first step is to create the definitions of our test cases in Xray. In our example, we will create three test case definitions called QTAF-1, QTAF-2 and QTAF-3.
First you have to click on "Testing Board" in the left menu of Jira to get to the user interface of Xray. The following screenshot shows the testing board of our example project. Create the three test case definitions for our test cases here.

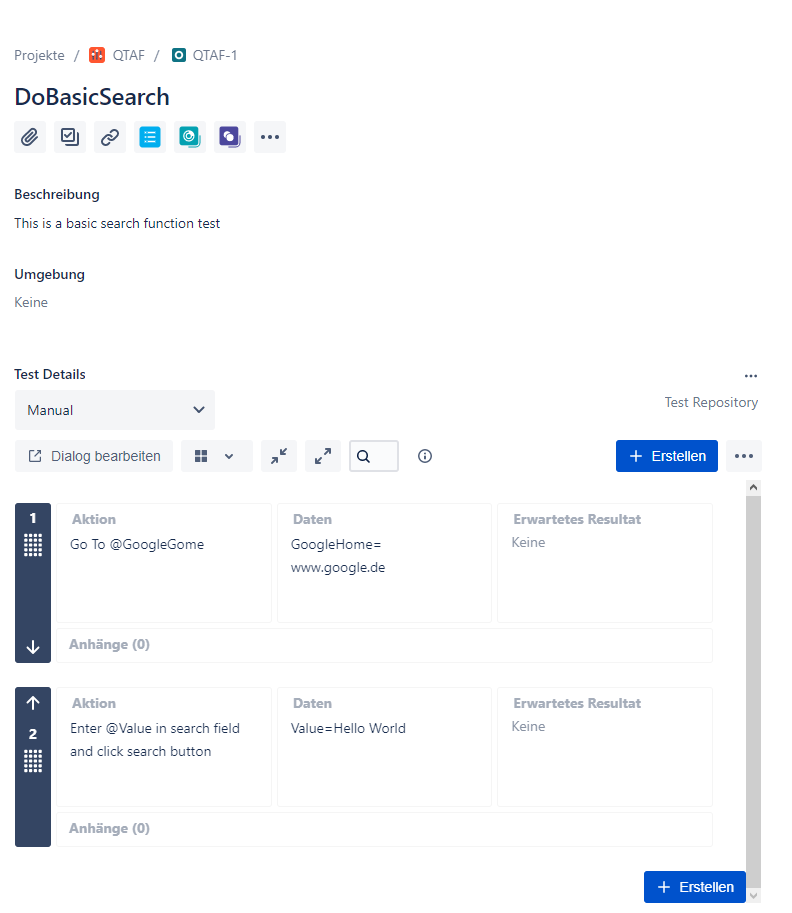
Test steps must still be defined for each of the three tests. In the Xray user interface, these can be found in the "Test Details" section. In our example, we assume that the tests QTAF-1, QTAF-2 and QTAF-3 have two, three and two steps respectively. The following picture shows the test case QTAF-1 in Xray:
If you're using Qtaf with Xray, the test environment may be missing on Xray. In such cases, you need to configure the required test environment. Refer to this link for more details.
QTAF and Xray⚓︎
This section shows how the recorded information about the executed test cases and test steps can be automatically sent to Xray.
In addition to qtaf-core, first integrate the dependency qtaf-xray-plugin into your project: Make sure that you use the current version numbers of these modules. You can find them at the Maven Repository
Next we have to store the credentials for Xray in the configuration.json file. To do this, add the following section to this file:
Then create three test cases and annotate each with all required annotations. To assign a test class to a test in Xray the annotation @XrayTest must be set for the respective Java method and the attribute key of the annotation must correspond to the key of the test in Xray. The following example shows a test whose results are to be stored in Xray under issua QTAF-1.
In order to also document the test steps, methods must be called in the test that are provided with the annotation @Step of the Qtaf framework. In this example, we assume that there are two methods that are defined in a separate class called GoogleFunctionsPage.
We then call these methods in the test case.
QTAF registers the call of these methods and logs the call in the background. Here, no IDs need to be defined for the test steps. QTAF assigns the called methods in the order of the steps defined in Xray.
Now execute your test cases as usual. After the execution of your test cases is finished, QTAF will show you the following statement in the console:
This means that the upload to Xray was successful and can now be viewed in Jira under the key "QTAF-846".